sewing tutorial

Under the Sea Crossbody bag

slider-image.gif

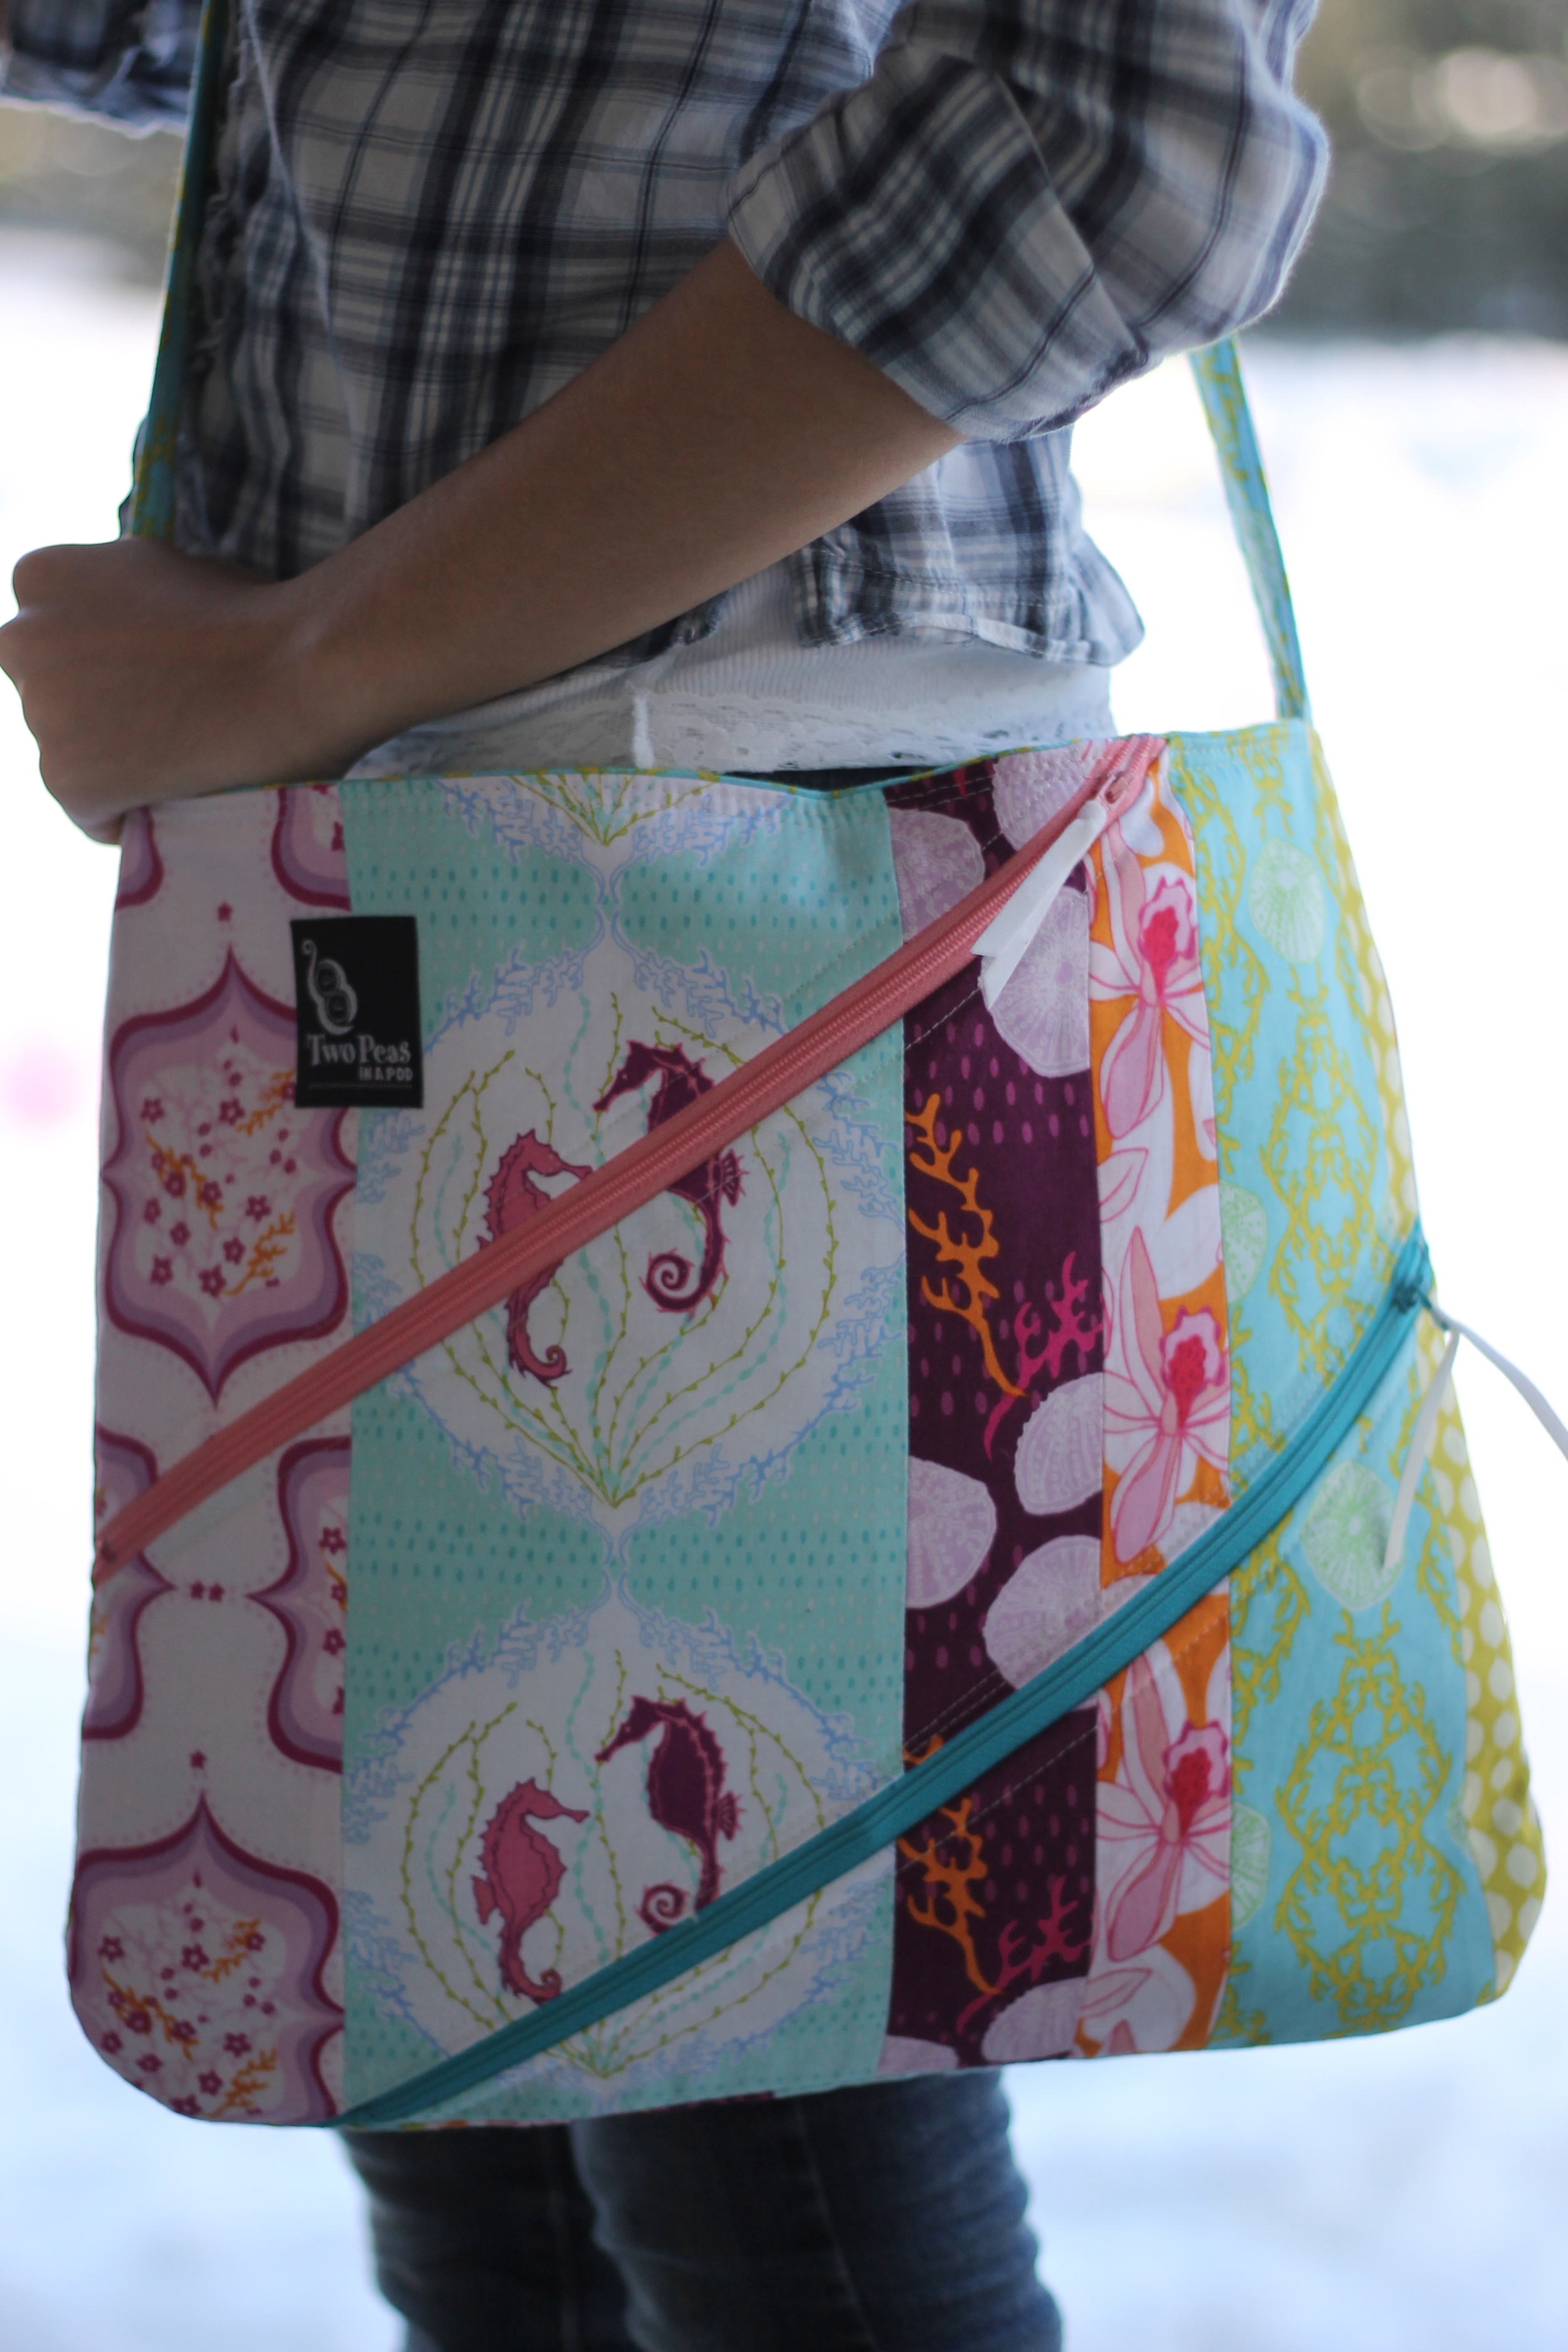
IMG_9525I've had this sweet little double zip crossbody bag on my drawing board for a year now. Guys...a year. Procrastination much? I don't know if I can quite call it that or just that this pattern has stumped me and I just needed to set it aside and let it simmer.

Sometimes, I know exactly what I want to say but it's hard to put into words which is what I have found while I've been writing this pattern with one particular step.

Now I need your help. Would you be willing to give it a go? I'd like to send this in PDF form to a few testers and see if my words make sense enough that you can recreate this bag.

Quite frankly, the double zipper is awesome. The lower part is perfect to slide your cell phone into. The center pocket is the remainder size of the bag and fits a little notebook perfectly. And I always have a nice little notebook and pen set I carry around.

I am a total OFFICE SUPPLY junkie. If you ever want to know what to get me for my birthday - it would be something like THIS. No joke. (and no, this is not an affiliate link) I love office supplies. So I do in fact carry THESE (I have 2 sets. One for my use. One I let the Sprout use on the road.) and a notebook all the time. I often give notebooks as gifts and pens. Everyone in my office knows of my sincere love of office supplies and knows I hoard all the good pens. It makes me happy. Serious as a heart attack happy. I'm not sure what that all really has to do with this bag but my birthday is in exactly 20 days, cough, cough. Just saying....

If you're interested in testing this bag, leave me a comment below and I'll be in touch. Thanks gang!

fabrics: courtesy of Mo Bodell from her Full Moon Lagoon line that I adore

Kiss the Cook Table Runner

kiss-the-cook.gif

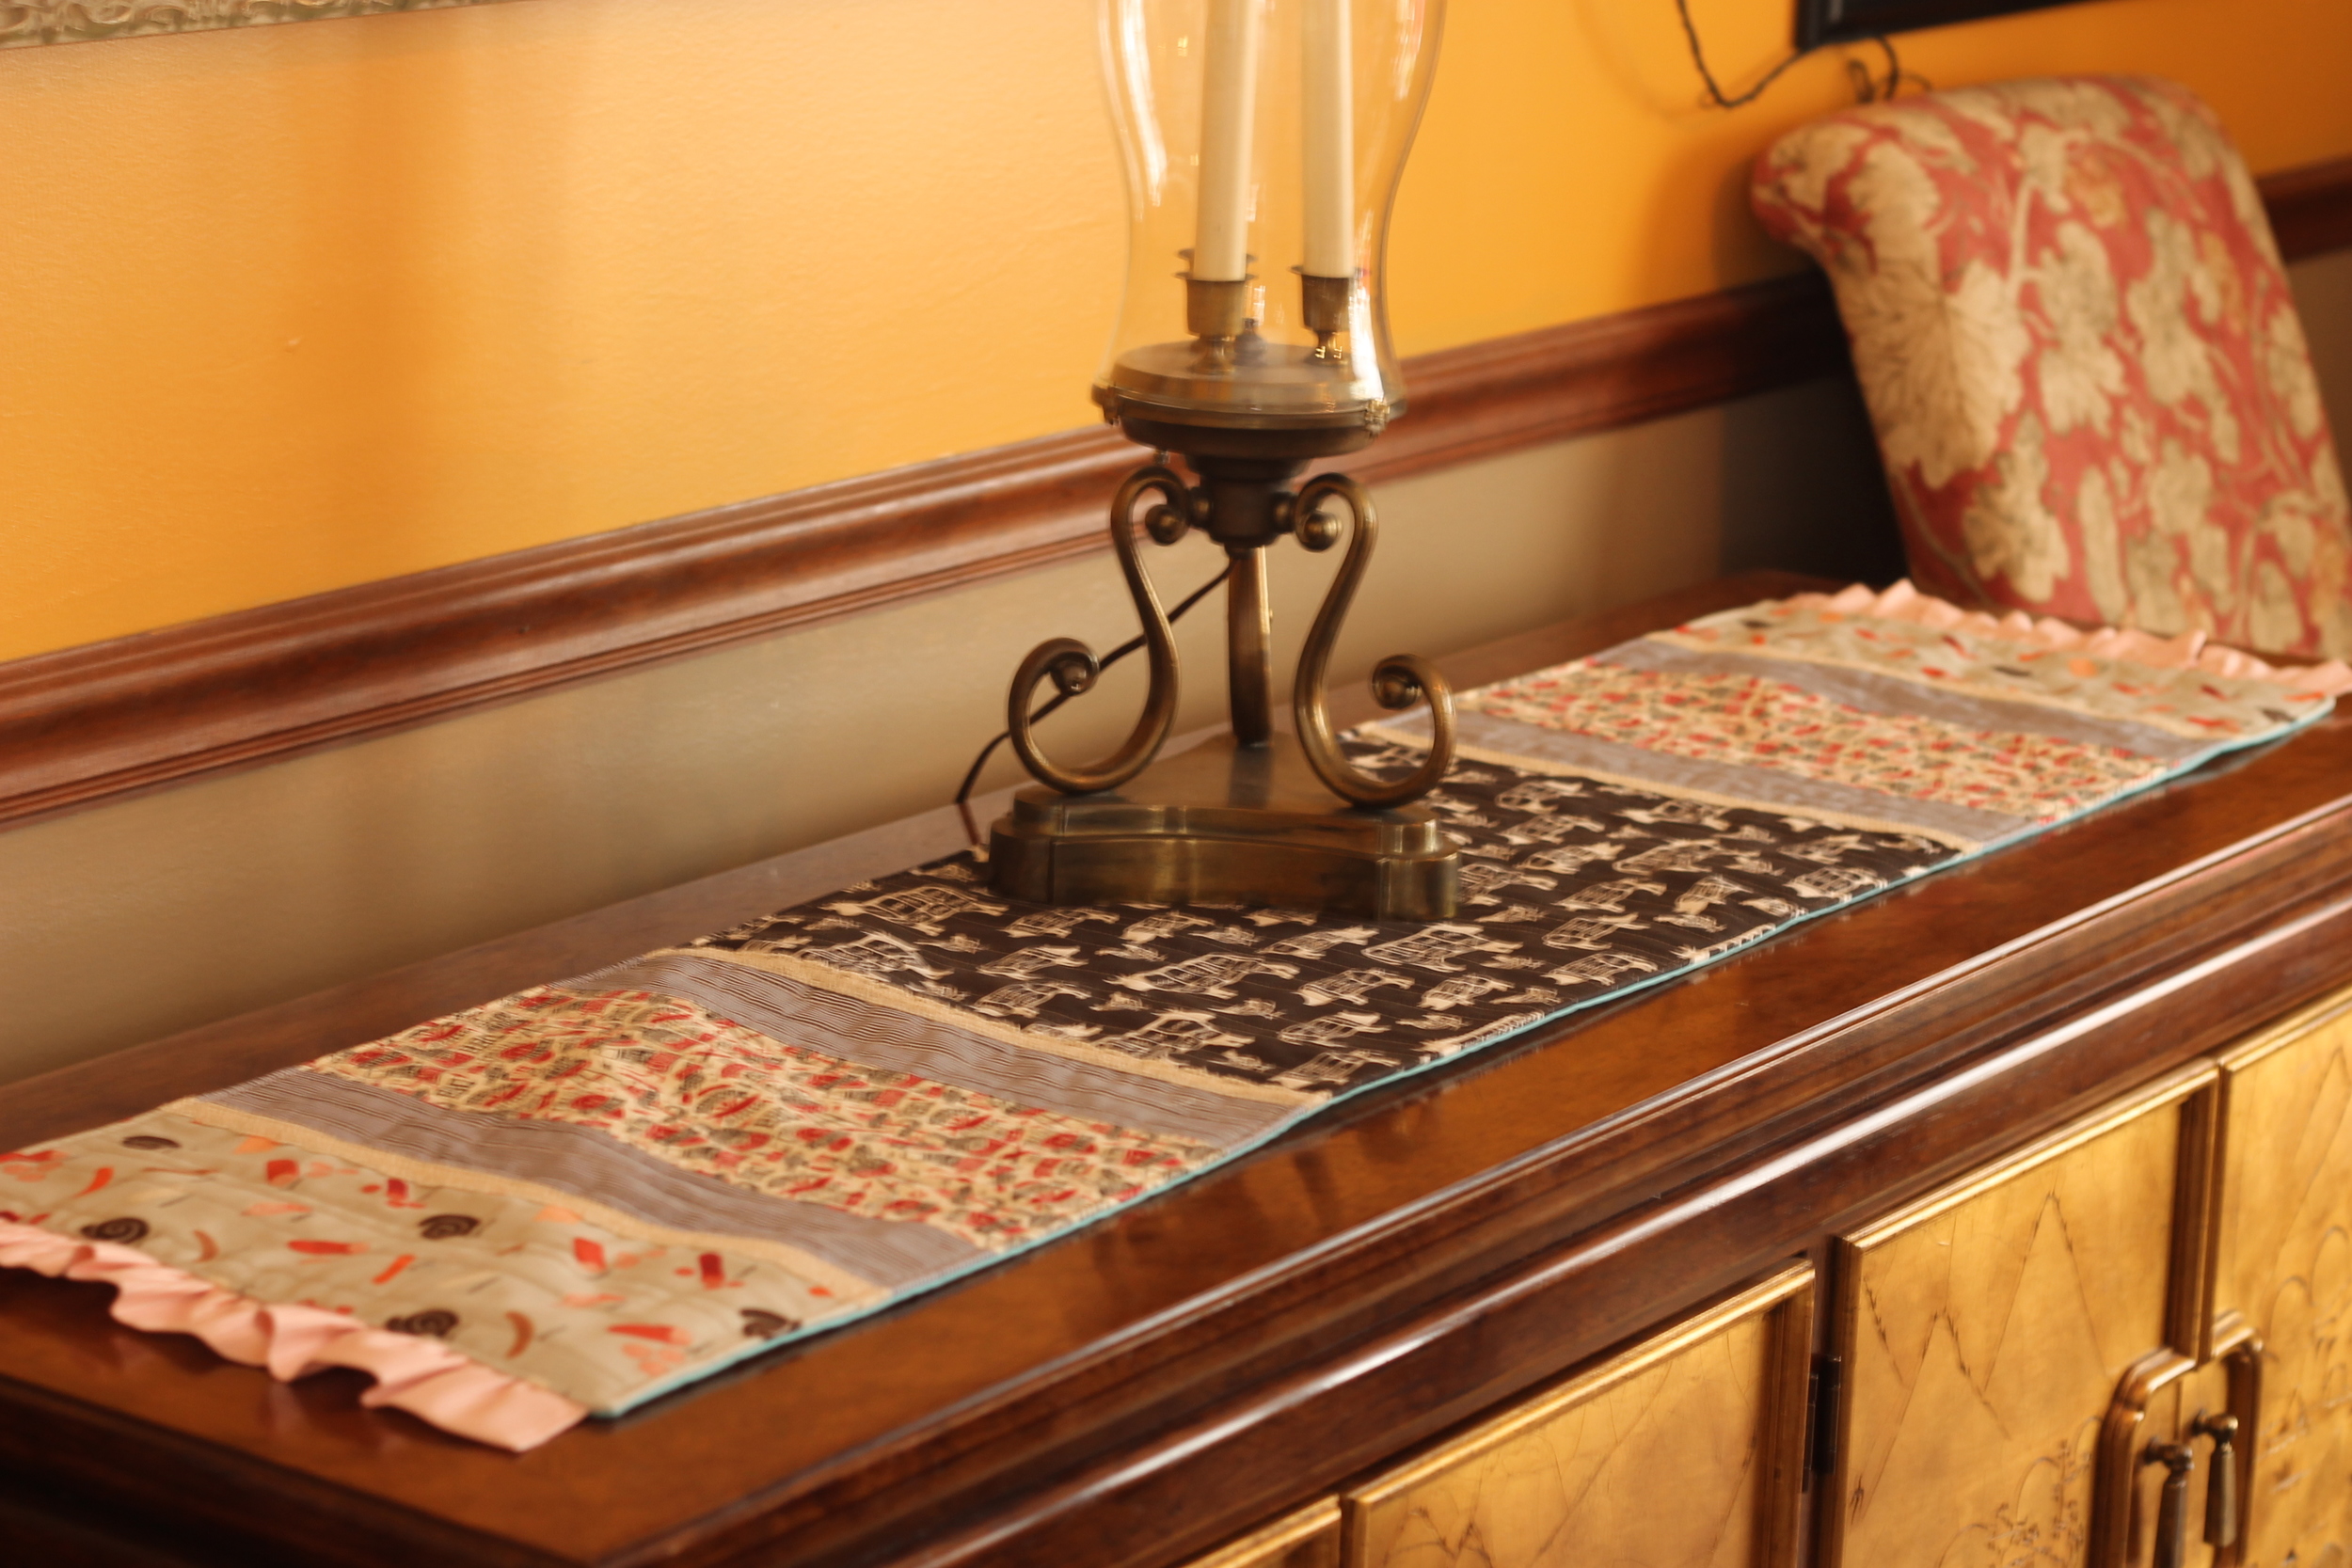
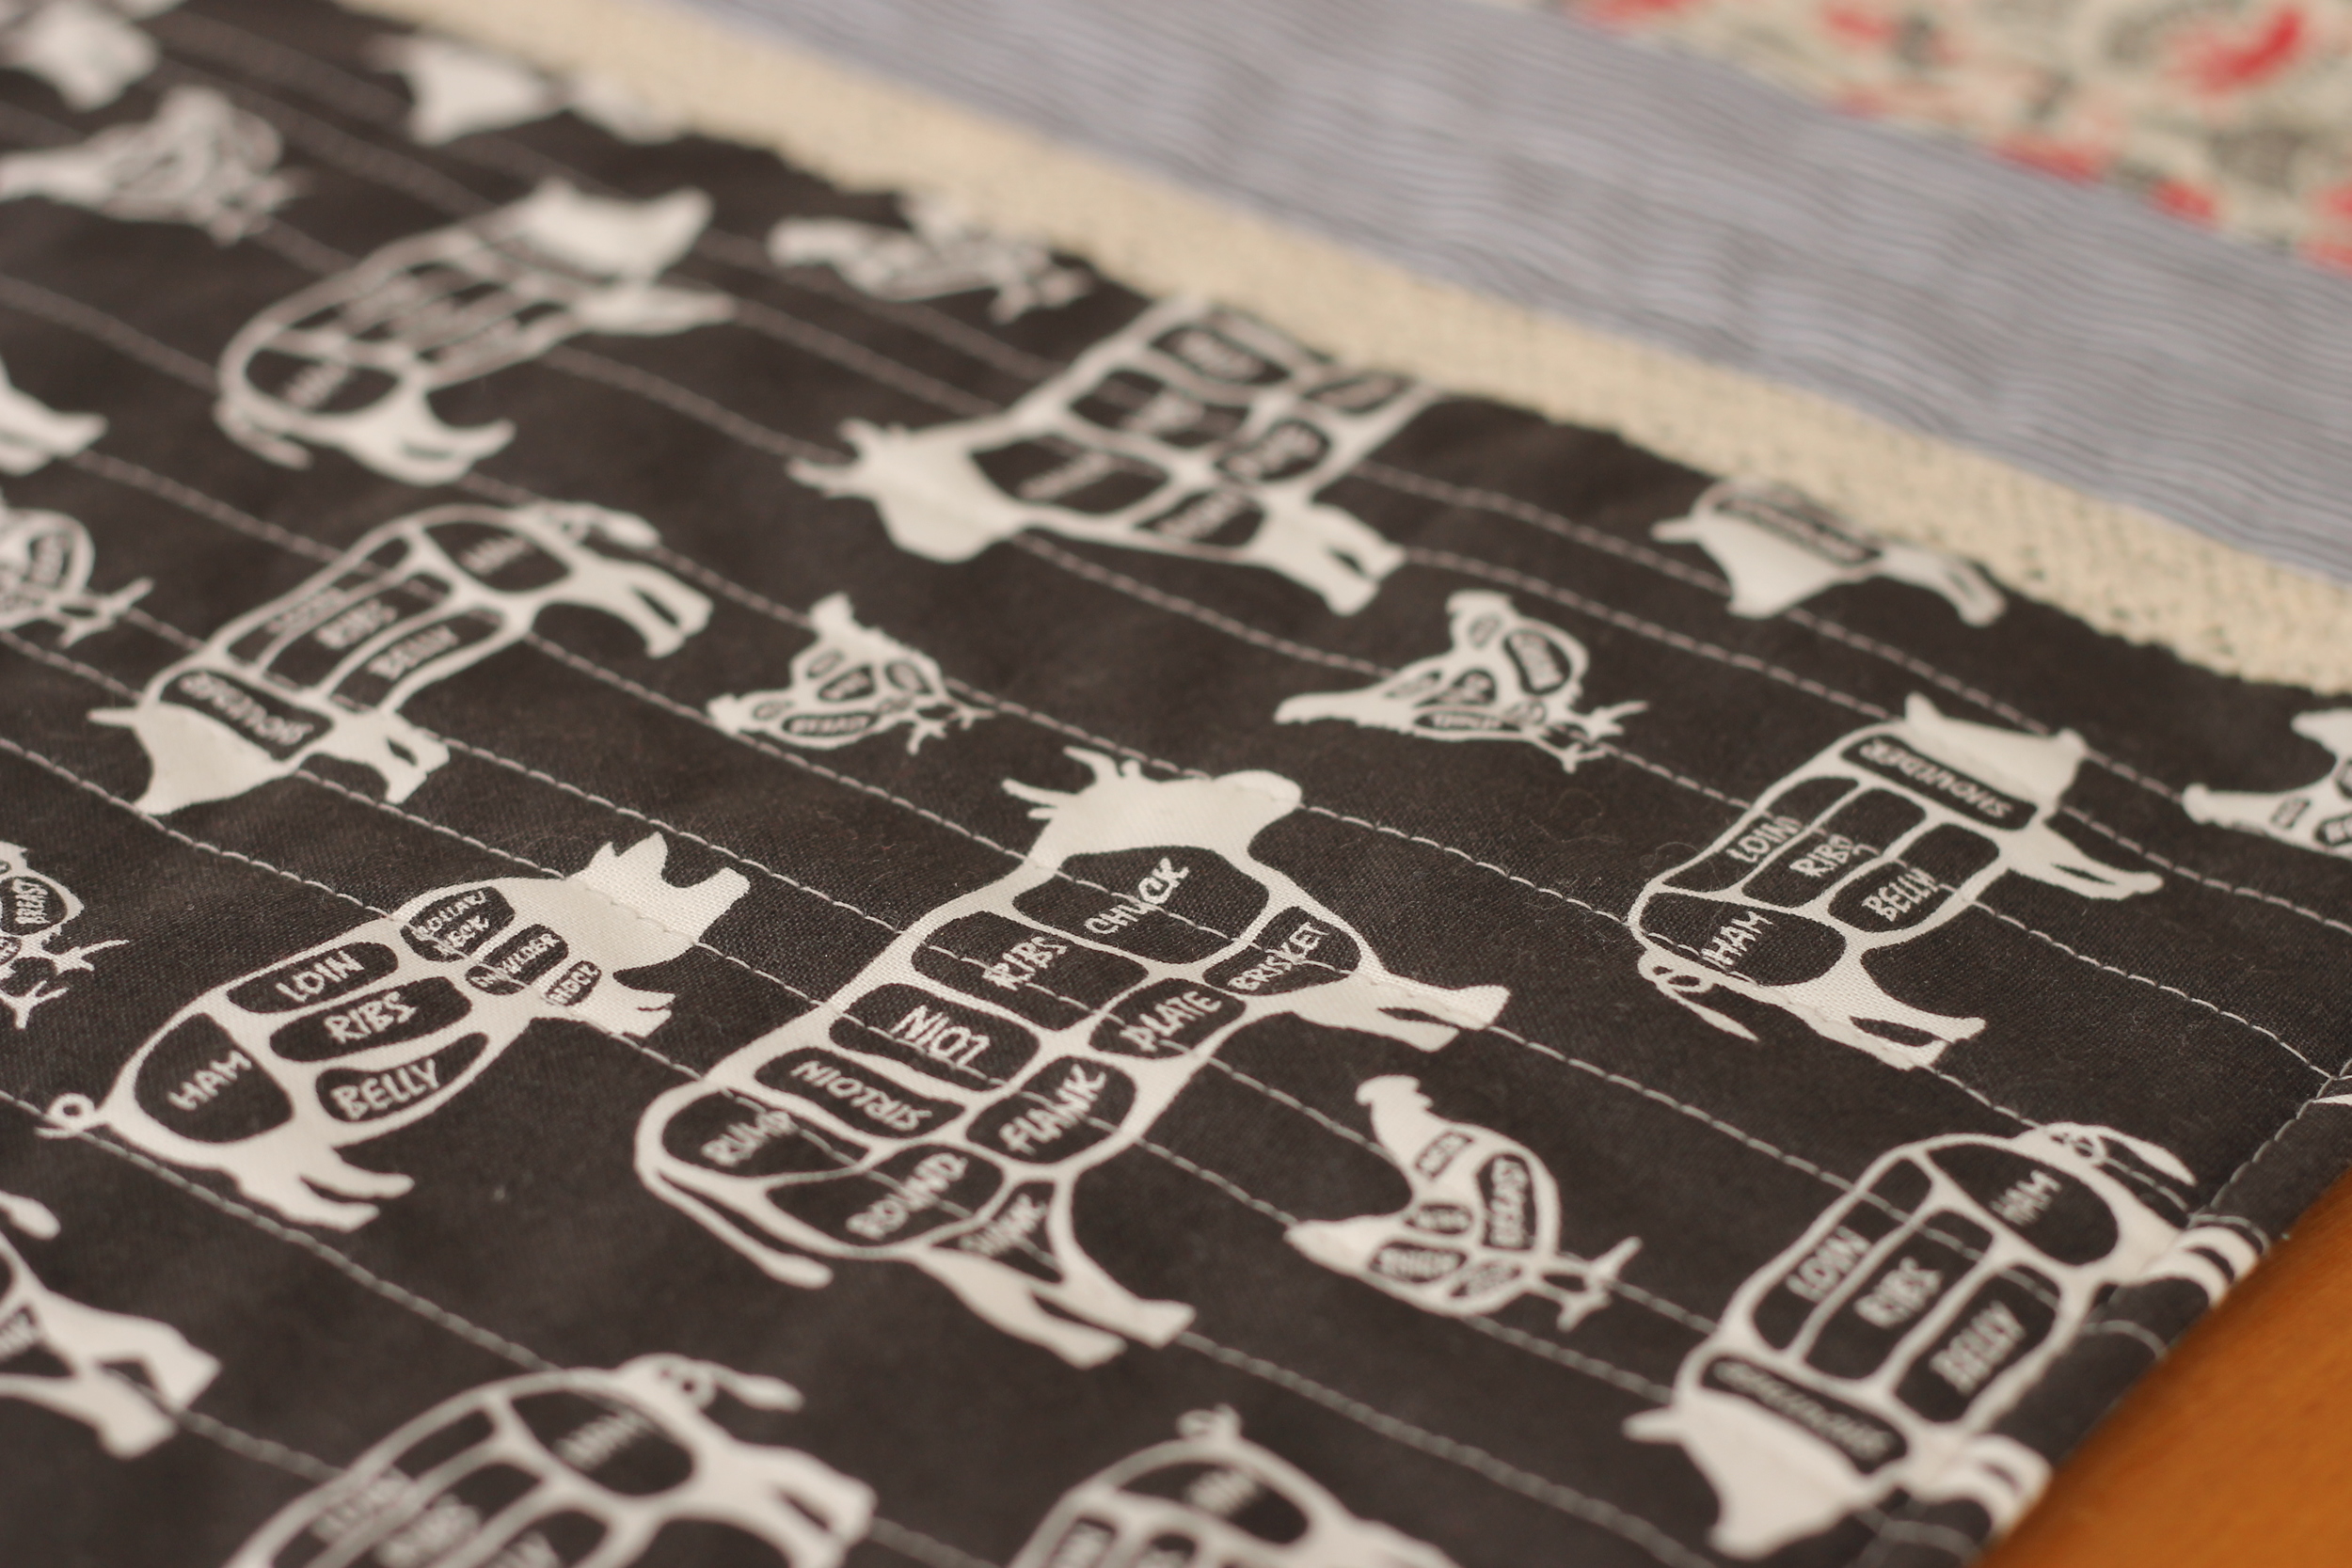
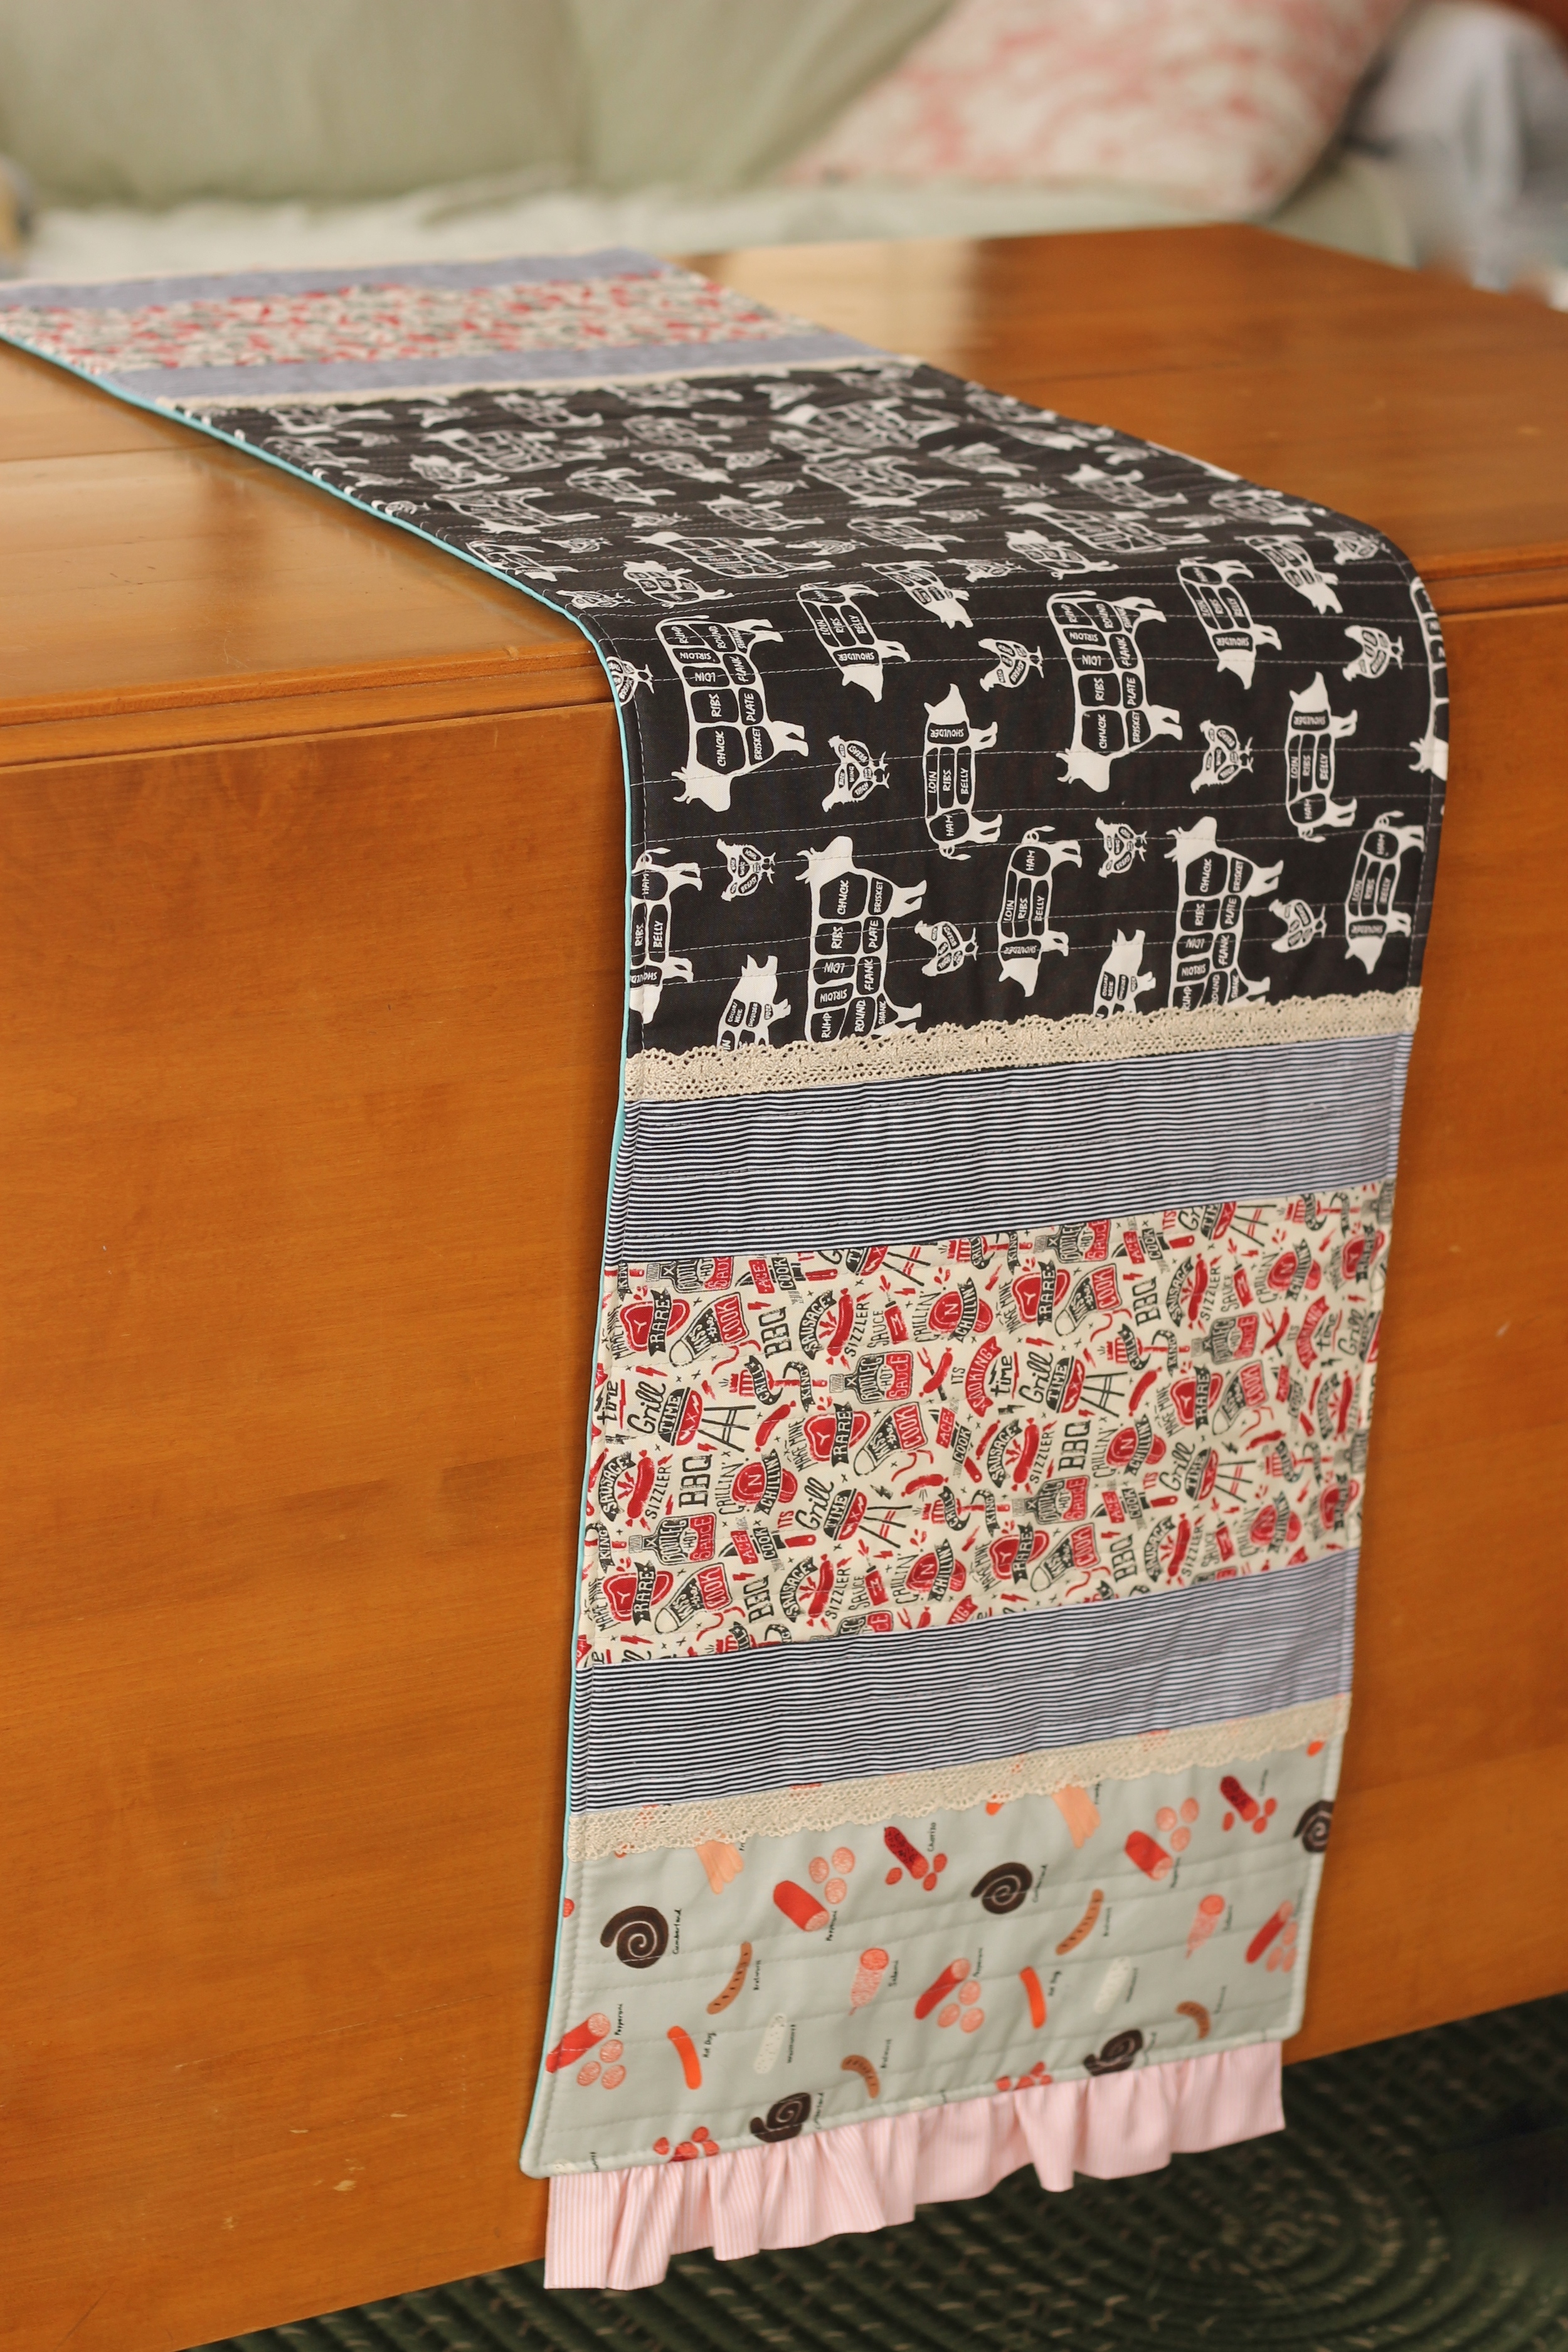
IMG_1373The other day, I posted about the Hearts on Fire Hot Pad tutorial that I created for the Olfa website and today I'm sharing an extension of that. More crafting for the kitchen.IMG_1375 This is a QUICK (because let's face it, I have kids. AKA I have no life of my own so quick finishes are important for me!) but full of personality and cute table runner.

I used more of the Dear Stella, Kiss the Cook fabrics because I big puffy heart this line so much. For this project, adjust your repetition of the blocks or sizes to make a size runner that suits you best.

Kiss the Cook Table Runner - Finished size 55.5" x 13" Suitable for beginners Materials: Batting (I use THIS from the Warm Company) and Backing fabric - 52" x 13.5" strip Fabric:  Center butcher print panel - 21.5"  x 13.5"  - Cut 1 Striped print - 2.5"  x 13.5"  - Cut 4 BBQ print - 6" x 13.5" - Cut 2 Meat print - 6" x 13.5" - Cut 2 Ruffle - 4" x 24" - Cut 2 Lace Trim:  13.5" pieces - cut 4

Instructions:

  1. Piece together the runner top in the order shown below using 1/4" seams. table-runner
  2. To add the ruffle on the end, press both short ends in 1/4" to the wrong side. Then press in half on long side. Stitch the short ends closed. Run a basting stitch 1/8" from raw edge and gather. The ruffle should be 1" shorter than the width of the runner (12.5" in this case). This will prevent the ends from getting caught in the corner when we turn the runner in a later step.
  3. Match raw edges and pin ruffles to each end of the runner, leaving a 1/2" at each end (meaning, the ruffle will be shorter as described above, center the ruffle so that there is 1/2" on each end) and stitch.
  4. Place pieced top on batting and pin in place. Quilt as desired.
  5. Add lace trim and other embellishments as desired. In this sample, lace trim was placed along the edges of the striped print.
  6. With right sides facing, place quilted top on to backing. Pin in place. Stitch all the way around, being careful to not catch your end ruffles in your side seams. Leave a 6" opening on one side for turning.
  7. Turn runner right side out through opening. Steam press edges and top stitch all the way around runner.

IMG_1424

IMG_1422

IMG_1414 IMG_1413

IMG_1412

IMG_1410

IMG_1381

IMG_1379

IMG_1375Thanks Dear Stella for providing the fabrics for this project.


{blessed nest} a tutorial

Maggie Whitley from Gussy Sews has a great community on her blog where there is lots of discussion of inspiration, and business building, and crafting.  

I had the pleasure of putting together this simple tutorial for a table runner to share with her readers who are interested in a simple sewing project with some "gussy" ruffle inspired elements.

Here's a few more details showing the applique process:

You can find the full tutorial over at GUSSY SEWS!

And don't forget, through Monday, August 15th at 10am EST - use the code DogDays and receive 30% off patterns and more in my etsy store before it closes for an extended break.


{french seams tutorial}

My serger died.  Not really sure what happened or when.  It just quit working.  I've had several "expert" friends look at it and they are all baffled.  Bummer.  Now I have to find a place who can look at it and repair it.

In the meantime, I had a couple of Carol Jane dresses to sew up.  And serging the edges of your seams on garments are a must because it just gives it such a nice finish.  What's a girl to do?  I could zig zag stitch my seams.  But I wanted them even cleaner than that.  SO...remembering a bit about french seams I had used on Sprouts crib bedding - I decided that was the way to go.

Today, I'm going to share the method I used on this dress because the patchwork version I was working on has a lot of seams so this came in super handy!  This dress is really cute alone or paired with a long sleeve t-shirt and jeans.  It would make for a great back to school outfit!  This is a method you can use in loads of garment patterns if you don't have a serger and want nice clean seams inside.

STEP ONE

Start by laying your fabrics WRONG SIDES FACING, pin and stitch 1/8" seam.

STEP TWO

Press your seam so that right sides are now facing.  See in the photo above how we can see the raw edge of the seam is visible on the right side of the fabric and the clean edge is on the wrong side.  Press along the seam line and pin.  Now, stitch 1/4" seam to incase your raw edge of your seam.

STEP THREE

Now you can see how the raw edge is incased and now both our right side view and wrong side view are nice and clean.  But, we have the seam sticking up on the wrong side which will not be comfortable.  Press this seam to one side and then top stitch it down.  

That's it.  A bit more time consuming but the result is so worth it.  Your seams are equally beautiful on the INSIDE of the garment as they are on the OUTSIDE.  Are you inspired to give it a try?

Well, I'm getting ready to put my etsy shop on a short hiatus.  So through this weekend, enter the coupon code, DogDays, and receive 30% off EVERYTHING in the shop.  Patterns, including the Carol Jane dress, and finished items also included.  After Monday morning, the shop will be closed for several weeks while I catch up on projects.

30 Minute Maxi Dress

Well, I have REALLY jumped in technology!  My first video!  Now, I'm not promising that this is super high quality or anything.  I filmed myself in my backyard, in bright blinding sunlight in the last 15 minutes of Sprouts naptime.  By the time I finished this, I could hear her yelling, "MOOOMMMMAAAA!  I'M AWAKE NOW!". There are plenty of assumptions made in this "tutorial" that you have some sewing experience to make this project.  This is not really a very technical "tutorial".

I'm sharing with you today what I call my 30 Minute Maxi Dress (although at the end I think I refer to it as a 30 second dress, it's not quite THAT quick but pretty darn fast to put together).  Here's the thing...there is not one thing about this that is very technically correct in terms of garment construction.  Real seamstresses will CRINGE at what I'm about to tell you on how to whip this together.

Seriously.  I wanted a maxi dress.  I picked up some fabric, stitched it together - never cut it at all, added elastic thread and extended the length some with a contrasting hem band.  Bam!  3pm on the sewing machine, 4pm out the door in a new dress.  It does the trick.  Sometimes, you just gotta break the rules!  Watch this intro and then come back for more details below...

[youtube=http://www.youtube.com/watch?v=GOkDCsq5ksI]

I'm not sure that this will work for every shape and size, you be the judge.  I am {can't believe I'm going to share this} 5'5" tall and wear a dress size that is 8/10.  Yep, I did just share my dress size with the entire world.  You saw in the video that the top of the dress is the selvedge edge and by the time I put elastic thread in there, you can't even tell.  You may want to put a nice hem there - totally up to you.

I used 1 1/2 yards of fabric for my dress.  You would not want to use less than this for any adult size.  Here's why.  The longer the dress, below your knees, you need room to actually take a full stride step when walking.  If the dress is not big enough around, you'll be walking around like you have a cord tied around your ankles and hobbling little steps.  Make sense?

Also, to make the dress longer for you, just add some fabric to the bottom.  Cut a contrasting fabric to the same width as your dress.  When adding a hem band, I cut mine twice the size.  If I want a 2" tall hem band, I cut it 4".  Press it in half.  Then right sides of hem band to right side of dress, stitch.  Press seam up towards top of dress and topstitch all the way around.  I like doing them because you can see the underside of your hem quite often and this gives it a nice finished appearance rather than seeing a little 1" hem on the underside.

Again, the longer you make the dress, the more fabric I think I would use...if you truly make this fall to your ankle, and you are of average size, I might be very tempted to use a full 2 yards of fabric to give me more "walking room".

Ready?

1) You've got your fabric ready to go.  You've added the extra length on the bottom with your hem if desired already.  Selvedge edges at top and bottom of dress.  With right sides together, pin and stitch down that long edge.  Use a serger if you have one or zig zag along your edge to finish.

2)  Adding the elastic thread.  Mark even lines where you want to put your stitching.  I made mine about an inch apart.   After about 8 rows, I tried on the dress to see how much farther I wanted to go with the gathering.  You could also do 3 or 4 rows at the top and then 3 or 4 rows at your waist only - wear a cute belt with it!  Up to you...Starting at the side seam, tie a knot in the end of your elastic thread (leaving it on your spool) and lay it down on the wrong side of your fabric leaving about 2" of a tail.  Zig-zag stitch over the elastic thread, pulling very gently until you get all the way around your dress.  Be sure you are following your marked stitching lines so that you have straight rows!  At the end, I tie the end of my elastic thread to the tail I left at the beginning so it won't pull out and holds securely in the wash.  If you pull your elastic too tight, you won't be able to get in the dress.  If it's too loose, you're likely to have a "wardrobe malfunction" and those results would not be favorable.  Just sayin...

Continue with your elastic thread stitching until you have the look you want.  Again, I kept stopping and trying on the dress to see how it looked.

3)  Straps.  Cut your straps the desired length x 2" wide.  Just like you are making bias tape, press your long edge to the center and then in half.Press your ends nicely tucked to the inside so you have finished ends and stitch your strap down the long edge.  With my dress on, I determined where my straps would fit best and pinned them on.  Take the dress back off...THEN stitch the straps to the wrong side of the dress.  I also added, using the straps, a tiny loop on the back so that I could run my ties through there to help hold it up in the back.

That's it!  You can adjust this dress to fit anybody!  Little girl to adult and it would be really fun for a little girls sewing project.  It's so quick and so simple - and she will feel SEW accomplished from making herself a cute maxi dress!

Will you try one for yourself?

xoxo,

Trish

"Sew"ing Seeds with the Two Peas {a patchwork lanyard tutorial}

(*NOTE November 24th 2010 - Be sure you check out the home page for the latest giveaways from Two Peas!)

Yeah, I don't really know about this little post header...BUT hey, guess what?  TUTORIAL!  Awhile back I started what I called "Make it Monday".  Then found out somebody was already using that.  So I changed it to "Sew it Up Sunday" except I rarely post on Sundays.  They seemed to fall on Mondays by the time I got them up.  And I was gonna post one a month but yeah, like THAT happened!  Not so much.  So maybe a little "Sew"ing Seeds with the Two Peas...get it?  Sowing seeds...SEWing seeds...a little garden reference there.  Ok, whatever.  I kinda liked it - we'll see where it goes and maybe I'll actual design a real header for it if it sticks.

Let's make something!  You'll need scraps of fabric and some hardware.  Like a key ring and a lobster claw (see below). Recently the wonderful ladies of the Creative Connection Event asked if I could make up a few lanyards for their social media correspondents.  They needed to match their logo which was in a blue and pink color so I came up with these patchwork versions.  Let me share with you how you can make one too...for yourself, your favorite nurse, teacher...anybody who wears a lanyard.

For the ladies at the Creative Connection Event, I added rolled roses on a clip to their lanyards.  That way, they can remove the clip and wear it in their hair or clip it elsewhere.  Dual duty!  I love these little flapper girl buttons!Well, what do you think?  Are you gonna make a few?  Who are you gonna make them for?  Have fun and make lots!  (think fun little Christmas gifts...you could even attach a gift card to the end!)

xoxo,

Trish

Uncomfortable

Funny thing this whole faith thing, isn't it?  I mean, for those of you that believe in a higher power, whatever it may be, do you ever get those moments when you just go..."Ohh, freaky?!".

And by that I mean, a message just seems to totally stick in your head and motivate you?

I thought that for Monday, I would blog about how cold it's been, how I just can't seem to warm up and how I made myself this scarf.

And I started to plot out a few quick instructions I would share on the scarf so you could make one too.  Plotting as I woke this morning and got everyone up and going.  And then, as we always do, we headed off for church.

I totally love our worship service.  I grew up in a very traditional church where our service was the same most Sundays.  And my current church still offers that however, we opt to go to the contemporary service.  For one, my kids are in sunday school and so this is the service we can go to after their class.  Second, our dear close friends happen to be the worship band leaders.  And they totally rock.

And this Sunday, there were little video snippets that played before church began.  No music.  Just text. Asking if we were really "here".  What were we "hoping for"?  Hoping the service didn't go long?  Hoping to go home soon to eat lunch?  Hoping to sit back and just observe?  It was honest and uncomfortable.

Every Sunday, it's like this.  Something that stops you and grabs your attention and brings you for a moment into clear focus about why - just WHY we are sitting there in church.

And every Sunday, it's the same.  I'm hoping to get out of there soon.  Hoping the baby will sit still enough for me to grasp part of the sermon.  Hoping to go get a coke soon and hoping to get home and sew in the afternoon.  So much to do before the week starts.

And every Sunday, most Sundays, it's something like that first message - am I REALLY HERE - that makes everything around me disappear, makes my eyes focus on the cross, brings tears to my eyes and makes me remember what has been given to ME so I can have children, lunch, a sewing machine, a big glass of coke...a life.

Much of today's sermon was focused on doing what we've been asked and doing it when we are too comfortable.

Too comfortable in our chairs to get up and share a message with someone who really needs it today.

Too comfortable to not just write a check for money but to go out and give of our time.

Getting uncomfortable.  Doing things that are hard.  Doing things we'd probably rather not do but then again, hey, I'm pretty sure Jesus wasn't very "comfortable" dying on the cross but He did it anyway...for me, for you - for all of us.  And asks us to just do one little thing.  Tell others about Him.

Google this.  Jeremiah 1:4-10.

And it's not comfortable for me to do that.  Because people come here from all over the place and from lots of different perspectives.  Different religions.  Or no religion at all.  Everybody has a journey that led them to where they are.  And this is mine and I'm doing what I feel that I'm called to do.  I hope you'll allow me to do that now and again with you and I'd love for you to do that with me as well, with all of us.

Sharing faith can be very hard.  Uncomfortable.  Is this really the right forum?  Should I talk about this here?

Of course I should.  Of course you should.  Of course this is the right forum.

Which is why I thought when I wanted to write about how cold I've been - how I can't seem to get warm lately because of our freezing temperatures - how "uncomfortable" I've been in my sewing room (I even talked about this at my sewing class last Friday!) - that today's message and my message - seemed to have a purpose.  Right?

{Yep, so Thursday (here comes the "how to make a scarf" bit) - I cut scraps of fabric 6.5" wide and whatever length they were, stitched them together using a 2.5 stitch length.

Pressed the seams to one side and top stitched.  Once I had a long enough strip of around 64" or so, I layed it out on some fleece I had.  Cut around it, pinned and with right sides together, stitched it on leaving an opening for turning.  Turned it right side out.  Pressed it.  Topstitched all the way around and closed my opening.}

Then I wrapped it around my neck and that's where it's been every day since.  Making me more comfortable on those cold uncomfortable days.  See the analogy here?  I sure do.

xoxo,

Trish

sew it up sunday {love on a limb}

Sew it up Sunday (formerly known as Make It Monday - a little name change to make the google searching easier for my projects) kits are available HERE. Each month, I feature a different tutorial and invite you to sew along with me and make something new.  Our February feature - a bit early - is inspired by Valentines Day.

For February, I made a table topper for our dining room table.  You can adapt this to make a doll quilt or a table runner by adjusting the size.  You can also do this in all kinds of bright colors for a spring /Easter table top.

Materials besides the usual sewing machine and other doo-dads:

Doll blanket : 6 qty of 6.5" squares of varying fabric, 1/4 yard of flannel, 1/4 yard of backing fabric, scraps for applique.  (assemble square to lay 2 x 3).  You can increase the size as needed.

Table Runner: 15 qty of 6.5" squares of varying fabric, 1/2 of yard of flannel, 1/2 yard of backing fabric, scraps for applique. (assemble squares to lay 3 x 5)  You can increase the size as needed.

Table Topper: 36 qty of 6.5" squares of varying fabric, 1 yard of flannel, 1 yard of backing fabric, scraps for applique  (assemble squares to lay 6 x 6)  You can increase the size as needed.

If you are quilter, forgive me for what you are about to read.  I fudge all the way through this project.  I'm a mother of 3, a baby who is on the go and my sewing time is limited.  I make no promises with this tutorial...give it your best shot.  I'm just sharing how I do it to get the look without all the work.  Sew at your own risk.

The directions are the same essentially for each item - the doll blanket, table runner or table topper.  You can expect the table topper to take roughly two nap times to complete.  What?  You need that in real time you say?  Sorry...about 4 hours or less.  You can expect the other two to take substantially less time than that.

  1. Cut your squares.  {my sample shown here has used mostly Moda's french general fabrics with a few others thrown in - I think they are perfect for this "season of love" we are in}
  2. Lay out all your squares until you get them in the design order you like.  If you've never "quilted" before...we are going to sew these in rows.
  3. With right sides together sew the square from your top row, far left to the neighboring square with 1/4" seams.  Press your seams open.

  4. With right sides together using 1/4" seams, sew the next square on and continue until your entire top row has been sewn together with all of your seams pressed open.
  5. Repeat for the rest of your rows.

6.  Take your top row of squares and with right sides together, pin your second row to the top row.  You                 see where we are going with this?

7.  Sew each row to the next and so on until your top is completely assembled.

{applying your applique}

Once your top is complete, you are going to sew on your applique picture of the birds with their heart on a limb.  Click here to download a pdf of the applique pattern pieces  Love on a Limb

For the doll blanket, you will cut out 2 birds, 2 beaks, 2 wings, one limb, and 3 hearts of varying sizes.  You can place the scene in the center of your blanket.

For the table runner, cut out 4 birds, 4 beaks, 4 wings, 2 limbs, and 6 hearts - 2 large, 2 medium, 2 small.  You can place them at either end of the runner.

For the table topper, cut out 8 birds, 8 beaks, 4 limbs, and 12 hearts - 4 large, 4 medium, 4 small.

I didn't really give you the heart pattern - remember from elementary school how you fold your paper (fabric) in half, draw your half a heart and cut?  You can figure out that part, right?

You will also need to cut some ribbon.  One that will loop over your limb and one to tie into a bow.

I use a little stitch witchery to "glue" my applique pieces all down so they don't move while I'm stitching.  Place your bird beaks a little under your bird to hold them on better.  Place your wing on your bird, birds on their limb and your hearts all together.

Take your one piece of ribbon and BEFORE you "glue" or stitch your limb down, run your ribbon behind the limb.  Stitch all your applique pieces on.  I used both a straight stitch and a zig zag stitch and leave all my edges raw for that vintage look.  I looped my ribbon over the limb, sewed it down and then put a few stitches through the center of the ribbon bow to hold it together.

That's it.  Be patient.  I found that applying all of these appliques to the table topper took as much time as piecing the top.  If you have any questions - zip me a note!  But, be creative.  This is just the basic idea.

8.  Next, lay your completed top on top of your flannel.  Typically, in quilting, you use quilt batting.  Since I was using this on my table I didn't actually want all the loft that quilting creates.  I wanted to have some heft to it and lay flat on my table and so I choose to use flannel.  

9.  You want to make sure you have both layers pulled taut and everything smooth.  Pin your layers together and cut your flannel the same size as your top.

10.  Quilters - close your eyes.  You won't like this a bit.  I didn't quilt the top at all.  Instead, being lazy and needing to finish quickly, I simply did some decorative random stitching around the top to hold the layers of flannel and the top together.  You will see my random stitches in some of the photos.

11.  Next, the backing.  Being cheap and thrifty - I had a new bed sheet that I bought on clearance for pennies.  I used that for my backing.  This isn't a blanket (well, for the table top / runner at least) where          you will see both sides because it's flat on your table so if you can use some inexpensive plain fabric -               that works great for your budget!)  Lay your top onto your backing fabric and cut to size.

12.  Pin all 3 layers right sides together and sew around all sides using a 1/2" seam allowance.  Leave an opening about 8" long for turning.  I know, I know...this is not how to quilt.  We are cheating -                         remember?!   Who has time for a binding?  The baby is waking up soon!

13.  Turn your table top right side out.  Press and make your edges all nice and crisp.

14.  Now, our "binding" is really just a top stitched border.  I go around twice.  It'll do.  Be sure you have your opening securely closed.

Well, there you have it.  A doll blanket, table runner or table topper with some sweet little applique.  Pretty and nobody will know you totally fudged the whole quilting process - well, except for quilters who are cursing my name I imagine after reading this (tee! hee!)

Next month's {sew it up sunday} project will be some softies.  They are so much fun - I've been collecting some great beaded necklaces to adorn mine....you'll love this little project!

Hope you enjoyed this one - please share and link back to me.  Leave me a comment and let me know so I can come visit you too!  Don't forget, I do have a few kits available in my etsy shop for this project.

AND when you've finished your project - go click over there =>>> in the sidebar on my Flickr page.  I have a group for Sew It Up Sunday projects.  I'd love to see what you come up with!

And check out all the other goodies at Get Your Craft on on Today's Creative Blog

xoxo,

Trish
make it monday {patchwork wristlet}

Make it Monday - Trish Preston - Two Peas in a Pod Homegrown Designs

The Patchwork Wristlet - January 2010

Are you ready?  Here we go...

New for 2010, I will be hosting "make it monday" "sew it up sunday" (I'll explain the change later!) at the top of every month. Make it Monday Sew it Up Sunday is your opportunity to make something with me.  I'll have the complete instructions for you here on my blog.

In addition, if you're feeling pressed for time and want to sew along with us but don't have the time to put it all together, I'll have a limited number of kits prepared for you.  HERE in my etsy shop, you will find a handful of these projects all cut and ready to be sewn for you under the make it monday sew it sunday category.  Neatly packaged and ready to ship but only available for a very limited time.

Let's sew!

To start off the new year, a patchwork wristlet. You can adorn the front with a brooch, a buckle, a button, a yo-yo - be creative!   Read through all of the instructions first before beginning.

Here's what you'll need fabric wise besides all the typical sewing do-dads:

  • 5 strips of fabric cut 2" x 6.5"
  • a piece of fabric cut roughly 8.25" x 6.5" for the rear exterior.  I usually wait to cut this - using my top panel as my pattern.
  • 2 pieces of heavy fusible fleece interfacing cut 7.5" x 5.25" give or take.  You just want this to be about 1/2" smaller than the piece you are fusing it to.
  • a strap cut 2" x 14" in length
  • a piece of ribbon for the front of the wristlet
  • prequilted cotton, corduroy or heavy home dec fabric for the interior OR you can choose a quilting cotton.  Cut 2 approximately 8.25" x 6.5" (I usually do not cut my interior until I get my top pieced - then I use that top as my pattern to cut the exterior back and the interior pieces.  If you use a heavy fabric, you don't need to interface it.  If you choose to use a quilting cotton, you will want to interface it.
  • your embellishment for the front
  • 7" or 9" zipper

  1. Using 1/4" seams, sew your 5 strips of fabric together to construct the front.

3.  Use the top you have just assembled as your pattern.  Lay it on the fabric you chose for the rear exterior and cut out the rear panel.  Then cut out your interior pieces as well.

4.  Fuse the interfacing to the front and rear exterior panels following manufacturers instructions.

5.  Press your strap.  Press the fabric in half.  Open up.  Then press each half in half to the center.  Press in half again.  Stitch down both side of strap.

6.  Topstitch the front panel 1/8" from the edge of each seam / patch.  You can skip this if you want but it looks nice to topstitch.

7.  Stitch on your ribbon to the front panel.

8.  Make a loop with your strip and lay your wrist strap about an inch or so down from the top along the side - matching up raw edges and stitch.

9.  Sewing on your zipper.  I used a 7" zipper however, it is exactly the same size and can be a bit tricky to work with.  If you want a little wiggle room, use a 9" zipper.

10.  With right side up, lay your front panel down on your table.  Take your zipper and lay it right side down.  Take one of your lining pieces and line it up with the front panel and zipper and pin all 3 layers together - making sure everything is even.  Refer to the photo here for this step.

11.  Now flip these out so that your wrong sides are facing together and give it a little press.  Topstitch.

12.  Repeat for the rear panel.  If you're not sure if you have it correct - pin in place and then flip around while pinned so you can check before you sew.  Oh, you knew that!

13.  Don't forget to topstitch again!  When you are all done attaching your zipper it will look like...

14.  NOW...put your right sides together for the exterior panels, pin, and sew all 3 sides using a 1/2" seam allowance.  You'll need to fidget with it a bit, line up your seams along the zipper, push the zipper up a bit...you'll get it.  You want it to come together all nice and neat.

15.  Once you've sewn around those 3 edges, open up your zipper almost all the way.  Now pin the lining panels together, right sides together.  Stitch around all 3 sides and leave an opening in the bottom.  Clip the corners.

16.  Turn your bag.  You'll be pulling it all through the lining opening.  Sew the lining closed and tuck it inside the bag.

You're done.  How's it look?  I added a little ribbon to my zipper for a pull.

Everytime I do something new - it never turns out that great the first go 'round so practice and in a time or two of making these - you'll be a pro!

Do you have any suggestions?  Did you like it?  Did I screw anything up?  (I wouldn't be surprised :>) ) I'd love to hear from you so please - leave me a comment and let me hear from you.

Of course, post your make it monday projects on my Flickr page so we can all take a look at the gems you are creating.

Next months Make it Monday Sew it up Sunday project is full of Valentine sweetness - a doll blanket OR table topper.  I'll be posting the kits for this project in about a week give or take a few days so you can have them shipped in time for the project post when it comes up (I'm actually posting the Make it Monday Sew it up Sunday February project on January 25th) and you can whip it out straight away for the holiday.

{and just an extra note...I hope you enjoy the ideas and photos on my blog but please note that the content here including photos and text are the property of Trish Preston and may not be used, copied or transmitted without the express consent of Trish Preston.  For any inquiries, please email me at twopeasinapoddesigns@gmail.com.  Thanks!}

xoxo,

Trish